Reliabilt Electronic Deadbolt Manual: A Comprehensive Guide
This manual provides detailed instructions for the Reliabilt electronic deadbolt, covering installation, programming, operation, troubleshooting, and maintenance.
Resources from YouTube and lockeyusa.com, dated between 2020 and 2026, contribute to this comprehensive guide, ensuring a smooth user experience.
Welcome to the world of keyless convenience and enhanced home security with your new Reliabilt Electronic Deadbolt! This innovative deadbolt seamlessly blends traditional lock functionality with modern electronic technology, offering a secure and accessible entry solution for your home. This manual serves as your complete guide, walking you through every step – from initial setup and programming to daily operation and long-term maintenance.
The Reliabilt deadbolt is designed for easy installation on most standard doors, providing a robust defense against unauthorized access. Utilizing a digital keypad, you can create unique user codes for family members, guests, or service providers, eliminating the need for physical keys and the associated risks of lost or copied keys. Online resources, including instructional videos on YouTube (accessed as recently as 2025), and programming guides from LockeyUSA.com (dated February 16, 2023), supplement this manual, offering visual and detailed support.
This guide will empower you to fully utilize the features of your Reliabilt deadbolt, ensuring peace of mind and a secure environment for you and your loved ones.
Understanding Key Features and Benefits
The Reliabilt Electronic Deadbolt boasts a range of features designed to elevate your home security and simplify access control. Keyless entry via a customizable keypad eliminates the vulnerabilities associated with traditional keys – no more worrying about lost keys or potential unauthorized duplication. Multiple user codes allow tailored access for family, friends, and service personnel, with the ability to create temporary codes for short-term visitors.
An auto-lock function, programmable to your preference, ensures your door is always securely locked, even if you forget. The deadbolt also features a manual override using a physical key, providing a backup entry method in case of power failure or keypad malfunction. Online resources, including videos found on YouTube (dated between 2020 and 2025), demonstrate these features in action.
Furthermore, a low battery warning system alerts you when it’s time for a replacement, preventing unexpected lockouts. The benefits extend beyond security – convenience, control, and peace of mind are all integral to the Reliabilt experience.
Installation Process
Proper installation is crucial for optimal performance. This section details each step, from unboxing and door preparation to assembly and keypad configuration, ensuring a secure fit.
Unboxing and Component Checklist
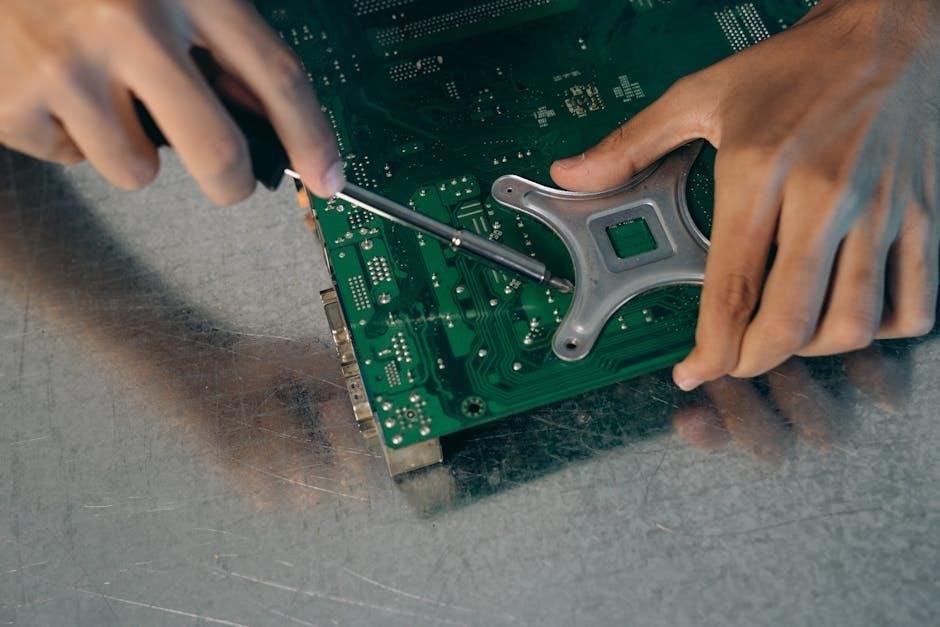
Carefully unpack your Reliabilt Electronic Deadbolt and verify all components are present before beginning installation. The package should include the exterior assembly, interior assembly, mounting plate, strike plate, latch, keypad, screws, and installation guide.
Inspect each part for any damage that may have occurred during shipping. If any components are missing or damaged, contact customer support immediately. A complete set ensures a smooth installation process. Refer to the included diagrams in the installation guide to familiarize yourself with each component’s purpose and placement.
Having all the necessary parts readily available will streamline the installation. Double-check against the parts list to avoid interruptions later. Proper preparation is key to a successful and secure installation of your new electronic deadbolt.
Preparing the Door for Installation
Before installing the Reliabilt Electronic Deadbolt, ensure your door is properly prepared. Verify the door thickness is compatible – typically between 1 3/8 inches and 2 1/4 inches. Use the provided template to mark the locations for the deadbolt hole and strike plate.
Carefully drill the necessary holes, ensuring they are clean and accurately sized. A properly sized hole is crucial for smooth operation. If your door has an existing deadbolt, remove it completely. Clean the area around the holes to remove any debris or old hardware.
Confirm the backset (distance from the door edge to the center of the bore hole) matches the deadbolt’s specifications. Proper door preparation is essential for a secure and functional installation. A misaligned door can lead to operational issues.

Installing the Deadbolt Mechanism
Begin by inserting the exterior assembly through the bored hole in the door. Ensure the tailpiece is correctly oriented towards the door’s edge. Next, attach the interior assembly, aligning it with the exterior assembly. Secure both assemblies using the provided screws, tightening them firmly but avoiding over-tightening, which could damage the mechanism.
Pay close attention to the alignment of the strike plate reinforcement. This plate strengthens the door frame and provides a secure point for the deadbolt to engage. Install the strike plate reinforcement using the longer screws, ensuring it’s flush with the door frame.
Test the deadbolt’s operation by manually extending and retracting the bolt. Smooth movement indicates proper installation. If resistance is felt, re-examine the alignment of the assemblies and strike plate.
Connecting the Interior and Exterior Assemblies
Carefully align the interior and exterior assemblies, ensuring the connecting cable is not pinched or twisted. Gently push the assemblies together until they click securely into place. This connection establishes the electronic communication between the keypad and the deadbolt mechanism.
Secure the connection with the provided screws, tightening them until snug. Avoid over-tightening, as this could damage the internal wiring. Double-check that the cable is fully seated within the connector to prevent intermittent functionality.
Once connected, test the basic operation of the deadbolt. Attempt to lock and unlock the deadbolt manually to confirm the connection is stable. If the deadbolt doesn’t respond, revisit the connection and ensure all components are properly aligned and secured.
Installing and Configuring the Keypad
Attach the keypad to the interior assembly using the provided mounting screws. Ensure the keypad is securely fastened and aligned with the deadbolt mechanism. Connect the keypad cable to the designated port on the interior assembly, verifying a firm connection.
Before full configuration, insert the required batteries into the keypad. Refer to the battery compartment for correct polarity. Initial power-up will likely initiate a setup sequence, potentially displaying a welcome message or prompting for a master code.
Consult the programming instructions (available at lockeyusa.com) for detailed guidance on setting up the master code. This code is crucial for all subsequent programming functions, including adding and deleting user codes. Proper configuration ensures secure access control.
Programming the Deadbolt

This section details setting up and customizing your Reliabilt deadbolt’s access control. Master codes, user codes, temporary access, and auto-lock features are explained for optimal security.
Master Code Setup
Establishing a secure master code is the first crucial step in programming your Reliabilt electronic deadbolt. This code grants full control over all deadbolt functions, including adding, deleting, and modifying user codes, as well as adjusting system settings. It’s paramount to choose a code that is not easily guessable – avoid using birthdays, anniversaries, or sequential numbers like “1234”.

Referencing resources like the EB915-Keypad-Programming-Instructions-1.pdf from lockeyusa.com, the initial setup typically involves pressing the “Program” button on the interior assembly. The keypad will then prompt you to enter a new master code, usually between four and eight digits. Confirm the code by re-entering it when prompted.
Remember to store this code in a secure location, separate from the deadbolt itself. Losing the master code may require professional assistance to regain control of your lock. Regularly review and update your master code to maintain optimal security.
Adding User Codes
Once the master code is established, you can add individual user codes for family members, guests, or service providers. Each user code allows specific access to the deadbolt without compromising the master code’s control. The process generally involves entering the master code first, followed by the “Add User” or similar programming function on the keypad.
As detailed in resources like the EB915-Keypad-Programming-Instructions-1.pdf, you’ll then be prompted to enter a new four to eight-digit user code. Confirm the code by re-entering it. The system will typically provide confirmation, such as a beep or visual indicator, that the code has been successfully added.
Consider assigning unique codes to each user for tracking purposes. You can also set limitations on certain codes, if the deadbolt model supports it. Regularly review and update user codes as needed, especially when individuals no longer require access.
Deleting User Codes
Removing user codes is crucial for maintaining security, especially when access needs to be revoked. The process typically begins by entering the master code, followed by selecting the “Delete User” or a similar function on the keypad. Referencing documentation like the EB915-Keypad-Programming-Instructions-1.pdf can provide specific button sequences.
You will likely be prompted to enter the user code you wish to delete. Upon confirmation, the system will usually provide an audible or visual signal indicating successful removal. Some models may allow deleting multiple codes in a single session, streamlining the process.
Regularly review and delete unused or outdated user codes. This minimizes potential security risks. It’s also a good practice to change the master code periodically as an added layer of protection; Always test the functionality after deleting a code to ensure it no longer grants access.
Temporary Code Creation
The Reliabilt deadbolt offers the convenience of creating temporary access codes, ideal for guests, service providers, or short-term rentals. This feature enhances security by limiting access duration. Typically, you’ll initiate temporary code creation through the keypad menu, accessed via the master code.
The system will prompt you to enter a new temporary code and then specify its expiration date or the number of times it can be used. Some models allow setting a specific time window for code validity. After programming, confirm the settings to activate the temporary code.
Temporary codes automatically become inactive after the set duration, eliminating the need for manual deletion. This is a significant security advantage. Always verify the code’s functionality before granting access and consider the sensitivity of the access being granted when setting the expiration parameters.
Adjusting Auto-Lock Timer Settings
The auto-lock feature on your Reliabilt electronic deadbolt provides an added layer of security by automatically locking the door after a pre-set period of inactivity. Adjusting this timer allows you to customize the convenience and security levels to your preferences.
Access the auto-lock settings through the keypad menu, usually requiring the master code for entry. The system typically offers several pre-defined time intervals, such as 30 seconds, 1 minute, 2 minutes, or 5 minutes. Navigate through the options using the keypad buttons until you reach your desired setting.
Confirm your selection to save the new auto-lock timer. Consider your lifestyle and typical entry/exit patterns when choosing a timer duration. A shorter timer enhances security, while a longer timer offers greater convenience. Regularly review and adjust this setting as needed.
Operation and Usage
This section details how to effectively use your Reliabilt deadbolt, covering keypad entry, key operation, manual override, and low battery procedures.
Understanding these functions ensures seamless and secure access to your home.
Using the Keypad for Entry

Entering your home using the keypad is the primary method of access with your Reliabilt electronic deadbolt. To unlock the door, simply enter your programmed user code followed by the ‘Unlock’ button (typically indicated by a green checkmark or a similar symbol). The keypad will illuminate, providing visual confirmation of your input.
Ensure your fingers are clean and dry for optimal keypad responsiveness. A short beep or a visual indicator confirms successful code entry. If an incorrect code is entered, the system will typically provide an audible warning and require you to re-enter the code. Repeated incorrect attempts may trigger a temporary lockout feature for security purposes. Refer to the troubleshooting section if you encounter persistent issues with keypad functionality. Remember to keep your codes confidential to maintain the security of your home. The provided resources, including those from YouTube, may offer visual demonstrations of this process.
Using a Key for Entry
Your Reliabilt electronic deadbolt is equipped with a traditional key override for situations where keypad access is unavailable, such as during a power outage or if the electronic components malfunction. The key cylinder is located on the exterior side of the deadbolt.
To unlock the door using the key, insert the provided key into the cylinder and turn it clockwise. Ensure the key is fully inserted before applying pressure. The deadbolt mechanism should retract smoothly. It’s crucial to retain a copy of your key in a secure and accessible location, separate from the main key, for emergency access. Regularly test the key functionality to ensure it operates correctly. While the electronic features offer convenience, the key provides a reliable backup entry method. Remember that using the key does not require the system to be powered, offering peace of mind during power disruptions.
Manual Override Function
The Reliabilt electronic deadbolt incorporates a manual override feature, providing a method to operate the lock mechanically should the electronic components fail or during a complete power loss. This function ensures you always have access to your home, regardless of the electronic system’s status.
Locate the manual override opening, typically covered by a small protective cover on the interior side of the deadbolt assembly. Using a small screwdriver or appropriate tool, insert it into the override opening and turn it in the direction indicated by the markings. This will manually retract or extend the deadbolt. It’s essential to familiarize yourself with this function before an emergency arises. Regularly test the manual override to confirm its functionality. Remember, utilizing the manual override bypasses all programmed access codes and electronic security features, offering a direct mechanical control of the lock.
Low Battery Warning and Replacement
The Reliabilt electronic deadbolt is powered by batteries, and a low battery warning system is integrated to alert you when replacement is needed. Typically, a flashing red light on the keypad and/or an audible beep signal indicates low battery levels. Don’t ignore these warnings, as continued operation with low batteries can lead to lock malfunction.
To replace the batteries, locate the battery compartment on the interior side of the deadbolt. Using a screwdriver, remove the cover and carefully remove the old batteries. Install new, high-quality alkaline batteries, ensuring correct polarity as indicated inside the compartment. After replacing the batteries, the system may require reprogramming of the time and date. It’s recommended to keep a fresh set of batteries readily available to avoid being locked out. Regular battery checks, at least twice a year, are advised for optimal performance.
Troubleshooting Common Issues
This section addresses frequent problems like unresponsive keypads, locking/unlocking failures, incorrect code errors, auto-lock malfunctions, and potential connectivity issues.
Keypad Not Responding
If the keypad fails to respond, begin with the simplest solutions. First, ensure the deadbolt has sufficient battery power; a low battery is a common cause of keypad malfunction. Replace the batteries with fresh ones, confirming correct polarity during installation.
Next, inspect the keypad for any visible dirt or debris that might obstruct the buttons. Gently clean the surface with a soft, dry cloth. If cleaning doesn’t resolve the issue, attempt a reset of the deadbolt by removing and reinserting the batteries.
Occasionally, the system may lock up temporarily. Allow a few minutes for the deadbolt to reset itself. If the problem persists, consult the programming instructions (available at lockeyusa.com) to verify the keypad hasn’t been inadvertently disabled or locked. Resources on YouTube may also offer visual guidance for troubleshooting.
Deadbolt Not Locking/Unlocking
When the deadbolt fails to lock or unlock, several factors could be at play. Begin by verifying sufficient battery power, as low batteries often impede the motor’s function. Ensure the interior and exterior assemblies are correctly aligned and securely connected – a misalignment can physically prevent operation.
Manually test the override function using a key; if the key operates the deadbolt smoothly, the issue likely lies within the electronic components. Check for obstructions within the bolt channel itself. If the problem persists, review the programming settings to confirm no conflicting codes or timer settings are interfering with operation.
Consult resources like lockeyusa.com for detailed diagrams and troubleshooting steps. YouTube videos may visually demonstrate proper assembly and operation. If manual override also fails, professional locksmith assistance may be required.
Incorrect Code Error
Encountering an “Incorrect Code” error indicates the entered code doesn’t match any programmed user codes or the master code. First, double-check the entered code for accuracy, paying close attention to the sequence. Ensure the keypad buttons are functioning correctly; test each button individually.

Review the programming instructions (available at lockeyusa.com) to confirm the codes were entered and saved correctly during setup. If multiple users have codes, verify each user is entering their assigned code. Consider the possibility of accidental code modification.
If the master code is also rejected, a reset might be necessary, potentially requiring a factory default procedure. YouTube tutorials could offer visual guidance on code programming and troubleshooting. If issues persist, consult the manual or seek professional assistance.
Auto-Lock Feature Malfunctioning
If the auto-lock feature isn’t engaging as programmed, several factors could be at play. First, confirm the auto-lock timer is enabled and set to the desired duration within the deadbolt’s programming settings. Review the programming instructions (lockeyusa.com) to ensure the timer hasn’t been inadvertently disabled or set to an excessively long interval.
Low battery levels can sometimes interfere with the auto-lock function; replace the batteries with fresh ones. Check for obstructions around the deadbolt mechanism that might prevent it from fully extending or retracting, hindering the auto-lock process.

Consult YouTube tutorials for visual demonstrations of programming and troubleshooting. If the problem continues, a reset to factory defaults might resolve the issue, but remember this will erase all programmed codes.
Connectivity Issues (if applicable)
If your Reliabilt electronic deadbolt model offers smart home connectivity, troubleshooting connection problems is crucial. Begin by verifying your home’s Wi-Fi network is functioning correctly and that the deadbolt is within range of the router. Ensure the correct Wi-Fi password was entered during the setup process.

Check the deadbolt’s app for firmware updates; outdated firmware can cause connectivity issues. Restart both the deadbolt and your Wi-Fi router. If problems persist, try re-pairing the deadbolt with the app, following the manufacturer’s instructions.
Consult online resources like YouTube for specific troubleshooting videos related to your model. Remember that interference from other devices can sometimes disrupt the signal. If all else fails, contact Reliabilt support for assistance.
Maintenance and Care
Regular cleaning with a damp cloth, occasional lubrication of the mechanism, and timely battery replacements are essential for optimal performance and longevity.
Cleaning the Deadbolt
Maintaining the exterior finish of your Reliabilt electronic deadbolt is crucial for both aesthetics and preventing potential corrosion. Regularly wipe down the exterior surfaces – including the keypad, exterior housing, and strike plate – with a soft, damp cloth. Avoid using abrasive cleaners, solvents, or scouring pads, as these can damage the finish and potentially interfere with the electronic components.
For stubborn dirt or grime, a mild soap solution can be used, but ensure the area is thoroughly rinsed with clean water and dried immediately afterward. Pay particular attention to the keypad, ensuring no moisture remains trapped around the buttons. Inspect the deadbolt for any signs of debris accumulation around the bolt itself and carefully remove it. Consistent cleaning will help preserve the deadbolt’s appearance and ensure smooth operation for years to come, contributing to the overall security of your home.
Lubricating the Mechanism
To ensure the continued smooth operation of your Reliabilt electronic deadbolt, periodic lubrication of the internal mechanism is recommended. Use a silicone-based lubricant specifically designed for locks; avoid oil-based lubricants as they can attract dust and grime, leading to future malfunctions. Apply a small amount of lubricant into the keyway and along the bolt itself, working the bolt back and forth several times to distribute the lubricant evenly.
Do not over-lubricate, as excess lubricant can also attract debris. Focus on the moving parts within the deadbolt assembly. This process helps reduce friction, preventing sticking or difficulty in locking and unlocking. Regular lubrication, ideally every six months, will contribute to the longevity and reliability of your deadbolt, maintaining its security features and preventing costly repairs or replacements. A well-maintained mechanism ensures peace of mind.
Battery Replacement Schedule
Maintaining optimal battery power is crucial for the consistent functionality of your Reliabilt electronic deadbolt. While the deadbolt provides a low battery warning, proactive replacement is recommended to avoid unexpected lockouts. Generally, standard alkaline batteries should be replaced every 6-12 months, depending on usage frequency and environmental factors.
Higher-quality lithium batteries may offer extended life, potentially lasting up to 18 months. It’s wise to establish a calendar reminder for battery checks. Always use fresh batteries of the correct type as specified in the manual. Avoid mixing old and new batteries. A consistent replacement schedule ensures your deadbolt remains operational and provides reliable security. Regular checks, coupled with timely replacements, prevent disruptions and maintain the system’s integrity.