Motorcycle Manual Mastery: A Comprehensive Guide
Motorcycle maintenance and repair knowledge is crucial; factory service manuals detail everything, while owner’s manuals offer basic operational guidance for all riders.
Understanding the Importance of Motorcycle Manuals
Motorcycle manuals are absolutely essential for both new and experienced riders, serving as the definitive guide to understanding your machine. Many new riders surprisingly overlook the fact that all necessary information is readily available in these documents! There are typically two types: the owner’s manual, included with a new bike, detailing basic features and operation, and the service manual, a factory-written deep dive into maintenance and repair.
These manuals aren’t just helpful; they’re vital for safe and effective ownership. They outline crucial service intervals, fluid specifications, and detailed procedures for everything from oil changes to valve adjustments. Losing a manual, unfortunately, is common when bikes are resold, but replacements can be sourced. Ignoring the manual can lead to improper maintenance, potentially causing damage or even dangerous riding conditions. Prioritizing these resources ensures longevity and peak performance.

Types of Motorcycle Manuals: Owner’s vs. Service
Motorcycle manuals distinctly differ in scope and detail. The owner’s manual, typically provided with a new purchase, focuses on the bike’s features, basic operation, and routine checks like oil level and tire pressure. It’s designed for the everyday rider, offering a user-friendly introduction to the machine. However, it lacks the in-depth technical information needed for complex repairs.
Conversely, the service manual – created by the manufacturer – is a comprehensive resource for mechanics and serious DIY enthusiasts. It details complete disassembly and reassembly procedures, torque specifications, wiring diagrams, and troubleshooting guides. These manuals are often more difficult to obtain, especially for older bikes, but are invaluable for performing anything beyond basic maintenance. Think of the owner’s manual as a quick start guide, and the service manual as the complete encyclopedia;
Locating Your Motorcycle Manual

Finding your motorcycle manual can sometimes be a challenge, especially when purchasing a used bike. First, check with the seller – the owner’s manual should ideally accompany the machine. If it’s missing, contacting the manufacturer directly is a good starting point; they may offer digital or printed copies for purchase. Online marketplaces like eBay and specialized motorcycle parts retailers are excellent resources for both owner’s and service manuals.
Dedicated motorcycle forums often have sections where members share manuals or provide links to download them. Remember to verify the manual’s accuracy and relevance to your specific model and year. Don’t forget to check local motorcycle shops; they might have access to manuals or be able to point you in the right direction. Persistence is key – a manual is a vital investment in your bike’s upkeep.
Digital Motorcycle Manuals: Online Resources

Numerous online resources offer digital motorcycle manuals, providing convenient access to vital information. Many manufacturers now provide downloadable owner’s manuals directly on their websites, often in PDF format. Websites specializing in motorcycle parts and accessories frequently host service manuals for various makes and models, sometimes for a fee, but often offering substantial savings compared to printed versions.
Online forums dedicated to specific motorcycle brands are treasure troves of information, with members often sharing links to downloadable manuals or providing guidance on locating them. Be cautious when downloading from unofficial sources and always verify the file’s integrity to avoid malware. Digital manuals offer portability and easy searching, making maintenance tasks more efficient.

Basic Motorcycle Maintenance (Level 1)
Essential first steps involve chain cleaning/lubrication, correct tire pressure checks, and regular oil level monitoring to ensure optimal engine health and performance.
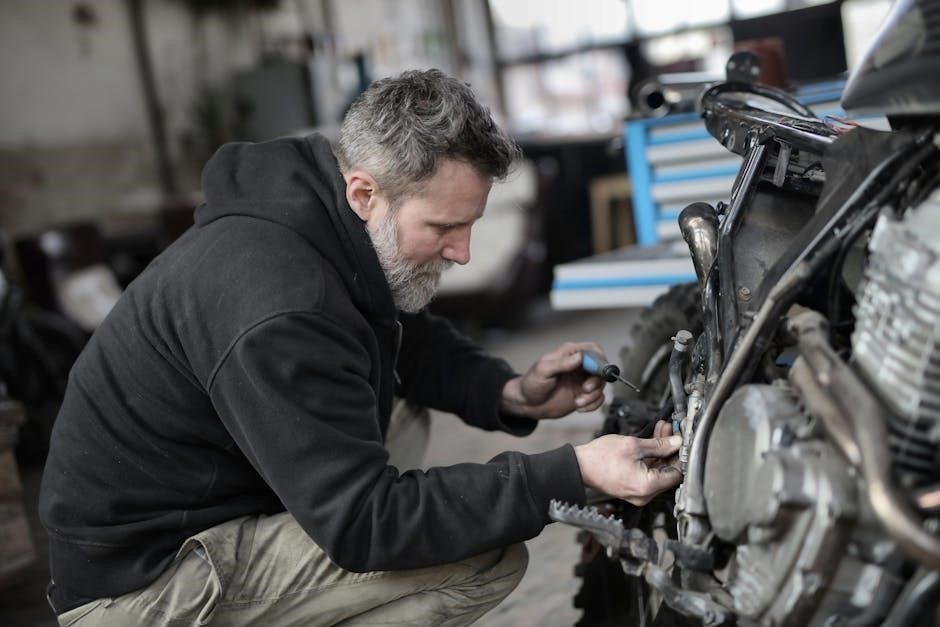
Chain Maintenance: Cleaning and Lubrication
Maintaining your motorcycle’s chain is fundamental to Level 1 upkeep. A clean and well-lubricated chain significantly extends its lifespan and ensures smooth power delivery. Begin by acquiring dedicated chain cleaning solution – avoid harsh degreasers that can strip essential lubrication. Apply the cleaner liberally, working it into the chain links with a soft brush, rotating the rear wheel to cover the entire length.
Once clean, thoroughly rinse the chain with water, ensuring all traces of cleaner are removed. Allow the chain to dry completely before applying chain lubricant. Select a lubricant specifically designed for motorcycle chains; these are formulated to withstand the high stresses and centrifugal forces. Apply the lube evenly along the chain’s inner surface while slowly rotating the wheel. Wipe off any excess lubricant to prevent attracting dirt and grime. Regular cleaning and lubrication, ideally every 300-600 miles or more frequently in adverse conditions, will keep your chain in prime condition.
Tire Pressure: Ensuring Optimal Performance
Correct tire pressure is a cornerstone of basic motorcycle maintenance, directly impacting handling, braking, and tire longevity. Always consult your owner’s manual for the manufacturer’s recommended tire pressures for your specific motorcycle model and tire size – these are typically listed in PSI (pounds per square inch). Tire pressure requirements differ for front and rear tires, and can even vary based on riding conditions (solo vs. with a passenger, or track vs; street).
Invest in a reliable tire pressure gauge and check your tire pressure regularly, ideally before each ride, and certainly at least once a week. Underinflated tires lead to sluggish handling, increased wear, and potential overheating. Overinflated tires reduce grip and can result in a harsh ride. Maintaining proper tire pressure ensures optimal performance, safety, and extends the life of your tires, saving you money in the long run.
Oil Level Checks: Maintaining Engine Health
Regular oil level checks are fundamental to motorcycle maintenance, safeguarding your engine from premature wear and potential failure. Your owner’s manual will detail the specific procedure for your motorcycle, often involving a dipstick or a sight glass. Typically, this is done with the motorcycle on a level surface and after the engine has been allowed to cool for a few minutes.
Ensure the oil level falls within the “minimum” and “maximum” marks indicated. Low oil levels can cause catastrophic engine damage, while overfilling can lead to foaming and reduced lubrication. Top up with the correct type of oil as specified in your manual if needed. Frequent checks, even if just a quick glance, can identify potential leaks or excessive oil consumption, allowing for timely intervention and preventing costly repairs.
Intermediate Motorcycle Maintenance (Level 2)
Level 2 maintenance involves a complete oil change, including draining the old oil and replacing the oil filter for optimal engine performance.
Oil Changes: A Step-by-Step Guide
Performing regular oil changes is paramount for maintaining your motorcycle’s engine health and longevity. Begin by warming the engine slightly for improved oil flow. Secure the motorcycle, then locate the oil drain plug, typically underneath the engine. Position a drain pan beneath the plug and carefully remove it, allowing the old oil to drain completely.
Next, remove the oil filter using a specialized filter wrench. Lightly lubricate the rubber gasket of the new oil filter with fresh oil before installing it hand-tight. Replace the drain plug with a new crush washer, tightening it to the manufacturer’s specified torque. Finally, add the correct amount of fresh oil, as indicated in your owner’s manual, and check the oil level using the dipstick. Dispose of the used oil responsibly at a recycling center.
Oil Filter Replacement: Ensuring Clean Oil Circulation
Replacing the oil filter alongside an oil change is vital for maintaining optimal engine performance. A clogged filter restricts oil flow, reducing lubrication and potentially causing engine damage. During an oil change, after draining the old oil, utilize an oil filter wrench to carefully remove the existing filter.
Before installing the new filter, lightly lubricate the rubber gasket with fresh oil – this ensures a proper seal. Hand-tighten the new filter until the gasket makes contact, then tighten it an additional half to three-quarters of a turn, as specified by the filter manufacturer. A properly installed filter guarantees clean oil circulation, protecting your engine from wear and tear and extending its lifespan.
Scheduled Motorcycle Service (Level 3)
Motorcycle service intervals, detailed in the owner’s manual, involve fluid changes (brake, coolant, oil) and thorough inspections of vital components for wear.
Understanding Service Intervals: Referencing the Owner’s Manual
Motorcycle service intervals are not arbitrary; they are carefully calculated by the manufacturer based on extensive testing and engineering data. Your owner’s manual is the primary source for understanding these crucial timelines. Ignoring these recommended intervals can lead to decreased performance, increased wear and tear, and potentially costly repairs down the line.
The manual will outline specific tasks for each service interval, typically categorized by mileage or time (whichever comes first). These tasks range from simple checks – like cable adjustments and brake pad inspections – to more complex procedures such as fluid replacements and valve adjustments. Pay close attention to the manual’s recommendations regarding oil changes, as these are fundamental to engine health.
Furthermore, the manual may differentiate service requirements based on riding conditions. For example, frequent short trips or riding in dusty environments may necessitate more frequent servicing. Always prioritize adhering to the manufacturer’s guidelines as detailed within your motorcycle’s owner’s manual to ensure its longevity and reliability.
Fluid Checks and Replacements: Brake Fluid, Coolant, and Oil
Maintaining optimal fluid levels is paramount for motorcycle performance and safety. Regularly checking brake fluid ensures responsive braking; low levels indicate potential leaks or worn brake pads. Coolant levels must be monitored to prevent overheating, especially in warmer climates. Oil, the lifeblood of the engine, requires frequent checks and timely replacements – typically every 6 to 12 months, or as specified in your owner’s manual;
When replacing fluids, always use the manufacturer-recommended type. Incorrect fluids can cause damage to components. Brake fluid absorbs moisture over time, reducing its effectiveness, necessitating periodic flushing. Coolant degrades and loses its anti-corrosion properties, requiring replacement; Oil breaks down and becomes contaminated with debris, diminishing its lubricating capabilities.
Proper fluid maintenance extends component life, enhances performance, and safeguards against costly repairs. Refer to your motorcycle’s manual for specific procedures and fluid specifications.
Component Inspections: Cables, Brakes, Suspension, and Electrics
Thorough component inspections are vital during scheduled motorcycle service. Cables – throttle, clutch, and brake – should be checked for fraying, smooth operation, and proper adjustment. Brakes require inspection of pads, rotors, and lines for wear and leaks, ensuring optimal stopping power. Suspension components, including forks and shocks, need examination for leaks, damage, and proper damping.

Electrical systems demand scrutiny of wiring, connectors, lights, and the battery. Look for corrosion, loose connections, and damaged wires. A functional battery and properly operating lights are crucial for safety. Regularly inspecting these components identifies potential issues before they escalate into major problems.
Your owner’s manual details specific inspection points and intervals. Addressing minor issues promptly prevents costly repairs and maintains your motorcycle’s reliability and safety.

Advanced Motorcycle Maintenance (Level 4)
Motorcycle tasks like tire changes and valve timing adjustments demand expertise; decide what you’re comfortable with and delegate the rest to professionals.
Tire Replacement: A Detailed Overview
Motorcycle tire replacement, a Level 4 maintenance task, requires careful attention to detail and adherence to safety protocols. Begin by gathering necessary tools: tire irons, a valve core removal tool, and potentially a bead breaker if the tire is stubborn. Loosen the axle nuts and remove the wheel from the motorcycle, referencing your service manual for specific instructions.
Deflate the tire completely and break the bead using a bead breaker or specialized tool. Carefully remove the old tire using tire irons, protecting the rim with plastic protectors. Inspect the rim for damage before installing the new tire. Lubricate the tire bead with tire mounting lubricant and carefully mount the new tire onto the rim, ensuring proper directional orientation.
Once mounted, inflate the tire to the recommended pressure (found in your owner’s manual) and check for proper seating. Reinstall the wheel onto the motorcycle, torque the axle nuts to the specified value using a torque wrench, and verify proper alignment. Always balance the wheel after tire replacement for optimal handling and safety.
Valve Timing Adjustment: Ensuring Engine Efficiency
Motorcycle valve timing adjustment, another Level 4 procedure, is critical for maintaining optimal engine performance and preventing damage. Incorrect valve timing can lead to reduced power, poor fuel economy, and even engine failure. This task necessitates a thorough understanding of your motorcycle’s engine and precise adherence to the service manual’s instructions.
Begin by removing the valve cover and locating the timing marks on the crankshaft and camshaft(s). Rotate the engine to the specified timing position, typically Top Dead Center (TDC) on the compression stroke. Use feeler gauges to measure the valve clearances, comparing them to the manufacturer’s specifications.
Adjust the valve clearances by loosening the locknuts and turning the adjusting screws until the correct clearance is achieved. Retorque the locknuts to the specified value and double-check the clearances. Reinstall the valve cover with a new gasket, ensuring proper sealing. Accurate valve timing ensures efficient combustion and prolongs engine life.

Essential Tools for Motorcycle Maintenance
Motorcycle maintenance demands specialized tools like paddock stands, torque wrenches, and safety gear—gloves and eye protection—for safe and effective work.
Paddock Stands and Lifts: Facilitating Under-Bike Access
For basic motorcycle maintenance, especially if your bike lacks a center stand, a paddock stand is invaluable. These stands securely lift the rear wheel off the ground, providing crucial access for chain maintenance – cleaning and lubrication are significantly easier. Different types exist, from simple rear paddock stands to more comprehensive front and rear lift stands.
A paddock stand isn’t just about convenience; it’s about safety. Working on a bike supported by a flimsy jack or directly on the ground is risky. A stable stand ensures the bike won’t topple during tasks like chain adjustments or tire inspections. Investing in a quality stand is a small price to pay for peace of mind and a more efficient maintenance process. Consider the weight capacity and compatibility with your specific motorcycle model before purchasing.
Specialized Motorcycle Tools: Torque Wrenches and More
Beyond standard tools, motorcycle maintenance often demands specialized equipment. A torque wrench is paramount, ensuring fasteners are tightened to the manufacturer’s precise specifications – crucial for safety and preventing damage. Incorrect torque can lead to component failure or, worse, accidents. Valve timing adjustments, for example, absolutely require accurate torque settings.
Other useful tools include chain breaker/riveter tools for chain replacement, specialized oil filter wrenches, and feeler gauges for valve clearance checks. Diagnostic tools, like multimeters, become essential for electrical system troubleshooting. While some tasks can be tackled with general tools, investing in motorcycle-specific tools streamlines the process and minimizes the risk of errors. Refer to your service manual for the correct tools needed for each procedure.
Safety Gear for Maintenance: Gloves and Eye Protection
Prioritizing safety during motorcycle maintenance is non-negotiable. Gloves are essential, protecting your hands from abrasions, cuts, and chemical exposure when handling parts or fluids. Oil, chain lube, and cleaning solvents can irritate skin, so robust gloves are a must. Eye protection, such as safety glasses or goggles, is equally vital. Debris, splashed fluids, or even compressed air can cause serious eye injury.
Consider wearing appropriate clothing, like long sleeves and pants, to shield your skin. A well-ventilated workspace is also crucial when working with chemicals. Always dispose of used fluids responsibly, following local regulations. Remember, a safe maintenance environment prevents accidents and ensures a more enjoyable experience. Consult your motorcycle manual for specific safety recommendations.